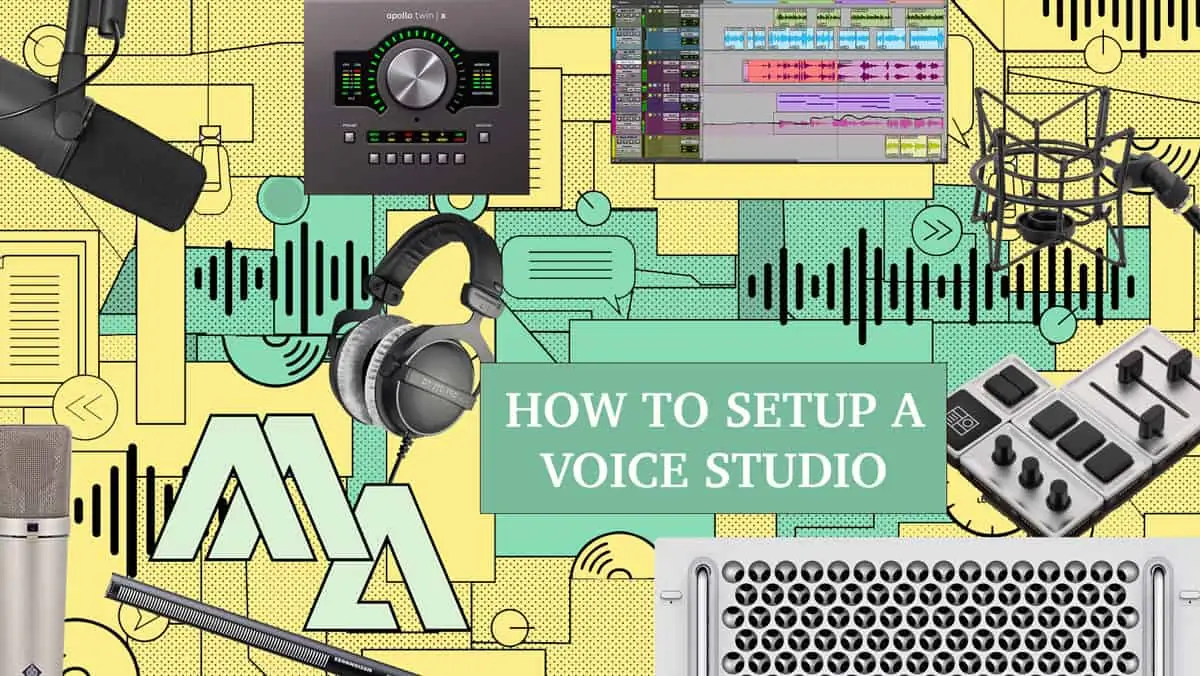
Choosing the Right Voiceover Recording Equipment
Following on from the last blog you should now have a great recording environment. A quiet, consistent, professional studio space with a low noise floor. This page will focus on how to set up a voice over studio and what voiceover recording equipment you may need. We’ll follow the studio chain from voice to final output and everything you need to think about in between.
I’ll try to offer at least three price entry points for each item. I’m aware that mentioning even a microphone to anyone involved in audio will open up a 30 minute monologue as to the pros and cons. Everyone has their favourites. Use this page as a springboard, these are not definitive lists.
Always try before you buy when you can. In England, I believe StudioSpares allow you to try microphones in their studio before you buy. It’s worth checking the returns policy of some local online retailers as well. This means you can try the equipment in your own studio. It may be that a particular microphone, for example, doesn’t perform as you’d like in your space.
Before you start buying gadgets….
More important than voiceover recording equipment, I believe, is the recording studio itself. Make sure you get that right before you spend money on any equipment. It will take a Herculean effort to make a £2000 microphone sound great in a terrible room. I covered this here, in my last post. Spend your money wisely. If you are just starting out let your investment in the equipment grow with your career. It’s a business, so you have to see a return on the investment. You’ll soon find yourself in the position I was in 8 months ago, where I seemed to have 10 of everything. 10 microphones, interfaces, drawers full of cables. Keeping a backup is advisable but collecting equipment like a voiceover magpie is not. Remember whilst this equipment may be expensive it will last for years.
Ok, so lets start at the very beginning. When the sound leaves your mouth (or whatever instrument you are playing) it will flow through a chain of voiceover recording equipment or processing before it is ready to be delivered to the client.

Pop Shield
Once the words have left the lips and before it continues in to the microphone, it will pass through a pop shield. This reduces any plosive expressed air you can sometimes get from pronouncing P’s and B’s. Similarly, some people will have overly sibilant sounds. These are harsh s, z, sh or ch sounds The pop shield allows the sound to travel through and deflects or diffuses the troublesome air away from the mic capsule. The condenser microphone you will probably be using is highly sensitive. You could hear a squirrel break wind at 200 yards. Don’t skimp on these smaller elements of voiceover recording equipment.
This first option is not a joke. I have been caught out whilst travelling and had to fashion a pop shield from a wire coat hanger and a pair of tights. I can’t remember the particular denier but they worked a treat.
What are the options?
Metal and nylon pop shields both work towards a common goal. Stopping unwanted sounds entering the microphone. The second option is a metal pop filter from Se Electronics that sells for £20. Metal pop filters work differently from their nylon counterparts. A dual layered nylon filter, shown in option 3, will diffuse the air in an attempt to slow it down before it hits the mic. This metal pop shield will instead redirect the air downwards away from the mic. I personally don’t notice that much of a difference between the two varieties. I would pay more attention to the build quality which normally gets better the more you spend. Pay particular attention to the quality of the gooseneck and the clamp. You may prefer a metal pop filter as they are more durable and easier to clean.
The Sontronics ST-Pop Filter is a slightly more expensive option, that will set you back £30. You can spend upwards of £60 on pop filters if you so wish. I’m not sure why you would. But you could. This is a dual-layer nylon mesh filter.
Some shock mounts (we’ll talk about them in a second) have built on pop filters. These can be an option if you are looking to save a little bit of money. They may stay in position better than the cheaper gooseneck variety but you won’t have as much control on their exact positioning. If you end up using a dynamic or a shotgun microphone you can also look in to purchasing a foam wind shield. This will do a similar job.

Voiceover Recording Equipment – Microphone
Ask anyone involved in audio what their favourite microphone is at your peril. I have lost many an hour whilst harmlessly trying to make small talk. A microphone isn’t a one size fits all thing. It isn’t even the case that the more you spend the better it is. A microphone fits you like a wizard doth a wand. Once you get more work you may also want to invest in different types of microphones, depending on the work you are doing.
Above, you will see a picture of three typical voiceover studio microphones. The first one is a slight curve ball to the normal line up. A microphone that some voiceovers might sneer at because it is a USB Microphone. An Audio-Technica AT2020 USB+ to be precise. It costs around £125 and is a cardio condenser microphone. Being a USB mic, it will plug straight in to your computer without the need of an audio interface. This means it could work as a good starter mic or as a travel companion to a more experienced voiceover.
USB Microphones are generally thought of as podcaster mics, but they may be suitable for some voice work. If your end audio is going to be reduced in quality anyway, because of where it is being used, you may get away with a USB mic. They are however, an entry level mic. Remember, an audio technician will be very aware if your studio is not up to scratch.
USB v XLR
The Rode NT1A is a popular choice for an entry level large diaphragm condenser microphone. It retails for around £150, but can often be found cheeper as part of a bundle (you can see an example at the bottom of the page). Unlike the previous microphone this will require a preamp and audio interface to work properly. This obviously means spending more money, but what you get in return is a very quiet professional standard microphone. Condenser mics are powered and will therefore give a stronger signal. They will capture a more intricate, nuanced vocal performance.
Now I am aware there is a vast difference between option two and three. Approximately a £1800 difference. The last option is considered the gold standard of voiceover recording equipment and that is the £2000 Neumann U87 Ai. That does not mean this is the mic to aim for. It doesn’t mean you won’t succeed without this mic. Neumann are well made there is no doubt but your voice may be better suited to one of their more affordable TLM range.

As I mentioned earlier try the microphones before you invest in them. Over the years you will collect a drawer full of them. Some of which you will never use. In addition to my large diaphragm condenser mics I also use a sure Sm7b, a Blue Baby bottle and a MKH 416 shotgun mic. All of them have there own characteristics and are better suited to different kinds of work.

Shockmount
Whether you are using a shotgun or condenser mic you will want it to be placed in to a shock mount. A shock mount, or cradle, is a suspension system that decreases the chances of vibrations travelling in to the mic capsule and distorting the recordings.
I haven’t added specific shock mounts as they will be determined by the mic you are purchasing, but you can see some examples above. You can expect to pay anywhere between £25 and £125

Mic Stand
People will spend a fortune on building a recording studio and buying a mic and interface. Sometimes little attention is given to the mic stand. I have changed my mic stand and it’s positioning more than I have changed my mic. You have to be comfortable when you work. For me I need a mic stand that will quickly and effortlessly follow where I want to go. I use a swivel mounted studio microphone boom arm. This means I can quickly stand or sit with no screwing or messing about adjusting a stand.
A floor mic stand with boom arm will do the basics and only cost £20. But eventually it may drive you crazy. Because of its splayed legs you aren’t as free to stand or move. If you are in a small booth it can take up a lot of the floor space. It’s also worth considering that sound can travel through the floor of a studio, up the stand and into the microphone. Be sure to attach mic stand isolator feet to the base to avoid those lower frequencies.
The second option is a Rode PSA-1, a professional boom arm that is easily adaptable. It can easily be mounted to a table or a wall. Depending on the way your studio is set up one of those options will be better than the other. Try testing the noise floor in both of these positions. This is a strong sturdy purchase that will do a great job.
Will the client know you spent £300?
Alternatively should you be feeling extravagant option three will set you back £300. This is a Yellowtech Mika mic arm. Usually found in broadcast surroundings it has the added benefits of hidden cable routing and a pretty little LED light that glows red when you are recording. Probably hard to justify, but lovely all the same.

XLR
Don’t try to skimp on what may appear to be a simple item. You are only as strong as your weakest link in the chain. The Neutrik or Mogami XLR cables shown above, will connect your microphone to your chosen audio interface

Audio Interface
The audio interface converts the analogue information sent from your mic in to digital information before it is passed on to the computer.
Check what connectivity your computer has. Some older computers with earlier thunderbolt technology may require you to use adaptors. Ideally you want to use as few links in the chain as you can.You also want to run at the fastest speeds you can. If your computer is capable of USBC, try not to buy an earlier USB interface. Buying the latest, fastest equipment will also future proof you against other advancements in software and technology.
Most audio interfaces will include the preamp needed to power your microphone. As you develop your studio setup over time you may decide that you would prefer a dedicated microphone preamp. The Focusrite ISA and Avalon range are a good place to start.
1 in | 1 Out
Option one on our audio interface lineup is the £85 Focusrite scarlet solo. I have never used the Focusrite Scarlett range but it appears to be a surefire hit amongst voice over artist. It is constantly cropping up on message boards and seems a great option for entry level VoiceOver. Due to its size it would also make a great travelling companion for jobs on the road. Chances are you will only need one input for your mic, which this happily provides. If you are a budding musician and like the idea of plugging in a guitar as well the Scarlett 2i2 will do the job.
Solid State Logic is an industry standard and their SSL2 desktop audio interface retails for £179. This is a solid bit of kit with great preamps. For a new VO daunted by the tech side of things this interface is easy to set up and operate. For those Voice actors looking for a change, I can’t recommend this interface highly enough. The SSL2 has all the connectivity you should require as a VoiceOver. However, you can upgrade to the SSL2+ which features an additional headphone output, along with 2 x stereo RCA outputs and 5-pin DIN MIDI in and out.
Lastly, you have the Apollo Twin X Duo which will set you back £789. This thunderbolt interface really is a speedy, versatile piece of kit. As a VoiceOver this will do all you ever need and more. Like the SSL2 it has a simple no nonsense usability. It’s packed full of features, many of which I never use, but the tech geek in me loves that they are there. As with any piece of studio equipment you want to know that you are working well within its capabilities.

Voiceover Recording Equipment – Monitoring
Your headphones will plug in to your audio interface. You should be looking at closed back studio headphones. You don’t want sound leaking from the headphones back in to the microphone. Headphones are essential to monitor whilst recording and also editing the audio. They will also isolate the audio you are recording, so you can focus on that and not the room you are in.
The truth is that I actually don’t really use my studio speaker monitors (KRK Rokit G4’s) whilst editing voiceovers. I know lots of voiceovers do. I will occasionally play the finished piece through them if I am mixing music and vocals. Although I am just as likely to play back audio on my laptop speakers, iPhone or iPad (If that’s where the audio will end up being used).
You are probably going to be wearing your headphones for many hours each day so make sure they are really comfortable. Again you may want to go to a shop and try a few on before you commit. Pay particular attention to the headband as well as the ear cushions. Not just how the pads fit around your ears, but the material as well. Think about how you will work, maybe you would prefer a single-sided cable, or a coiled cable. If you normally record with just one side over your ear you might be better suited to a streamlined, lower profile cup size.
Beware the bleed
The £77 Sennheiser HD280Pro find homes in lots of studios and are a great set of dynamic closed-back headphones. They are lightweight and great value for money. If you are looking for something to get you started or maybe a backup set of headphones you could travel with they are a great option.
You will find Beyerdynamic headphones in most studios as a default. They are an absolute industry standard known for providing top quality sound. My preference is the DT 770Pro’s. They are easy to wear for hours on end and are absolutely solid. I have had mine for years. Check out the whole range, I’m sure you’ll find the right fit for you.
The third option is only really there because I promised you three entry points. Truth be told I wouldn’t spend this much on a pair of headphones. I would spend more money on a pair of great studio monitors and keep my DT 770s. Should you have a need to splash the cash though these are a great looking set of headphones that sound great too.

Computer
The Heart of the recording studio. The audio signal will arrive from your audio interface via USB or thunderbolt cable to your desired computer. Your choice of computer may be dependent on what you are used to, what you already have or the budget you have. I am an apple convert. The whole Mac lineup is going to perform well, especially with their own silicon chips.
So what should you be thinking about when buying a computer. Mainly the RAM, the processor and the hard drive. RAM is specified in GB and Hz and if I was being general, I would say get as much as your budget will allow. Ideally you should be looking at a computer with 16GB of RAM, although 8GB may do the job. Be aware that some computers will let you upgrade the amount of RAM over time. Others will not. If you are going to be recording and editing one vocal line with not a lot of processing/plugins then 8GB may do the job just fine. As I’ve mentioned before you are better to be working well within your computers capabilities.
When looking at the processing of a computer, that’s when things may start to get a little confusing. Especially as it begins to get harder to compare like for like. Mac and PCs use different generations of processors. Within the apple range you are in pretty safe hands, especially with any new model. Whilst looking at PC’s. You may find that you get more value for money with a Ryzen processor than Intel.
Power Up
Finally, consider solid state drive (SSD) storage. they are faster and have no moving parts and therefore less unwanted noise. I also use an external hard drive to take some of the strain off of the computer. Whilst we are on the subject, please keep a back up of your back up of your back up hard drive. I won’t bore you with the story of when my hard drive spontaneously put on it’s own firewood display, but it was a very sad day indeed.
As I have mentioned before, many people house their computers outside of the booth and mirror an external monitor inside the booth. You can then control the computer with a wireless keyboard and mouse. This avoids any overheating of the computer and any unnecessary fan noise. You might also want to consider an ultra wide monitor. This allows you to effectively run three full size screens at once. For example a DAW, your script and your emails. All these little things will help speed up your workflow.
I won’t go in to too many details regarding the ACER, Mac mini and Pro. You can find their specifications by clicking their names. Your choice of computer is very much down to personal opinion and available budget.

Voiceover Recording Equipment – Audio Software
Now that the audio has passed through your pop shield in to the microphone, along an XLR cable in to an audio interface, travelled from your interface along your USB or thunderbolt cable in to your computer, it is now ready to be captured and edited by your audio software. Your DAW (Digital Audio Workstation) or Audio Editor is where you will monitor and edit your VoiceOver. These pieces of software will allow you to capture your audio, add any processing (such as eq, compression or normalisation) and produce a file that meets the clients specifications. It’s worth noting that most of my clients don’t require any post production, they simply want a cleaned up take of the script they provided.
Garageband is an entry level piece of software that ships with any Mac computer. They have a very simple interface that may suit a beginner to the technical world of VoiceOver. You will find many tutorials on YouTube that will guide you through the process. Once you get to grips with Garageband you could pay to upgrade to Logic Pro X. For those on a PC you may want to start out on Audacity, which is also free. Personally, I would start out with the Pro Tools First software which is also free and a great gateway in to the full ‘industry standard’ Pro Tools suite. GarageBand is also an option.
More Subscriptions?
You can subscribe to Adobe Audition for £20 per month. Sadly it’s not a piece of software you can just purchase. Alternatively you can use the whole Adobe Creative Cloud suite for £40 a month. I found Adobe Audition less intuitive as Logic Pro when I started using it. There is no doubt though that it has some great features. Batch Processing is simple. You can also add ‘favorite’ processing with the touch of a button. I often record in Logic and then process in Audition, when necessary.
Protools is the industry standard in voiceover recording equipment, you will find it in most studios worldwide. It does come with a heftier price tag. You can buy the software outright for £499 or pay a monthly subscription price of £25. Click the name above for a full in-depth spec. Needless to say this software will more than do the job. If you have any questions regarding software don’t hesitate to get in touch. As with most pieces of tech there are hundreds of message boards and supportive folk online who will be able to help you out with any quandaries you may have.
Other Things to Consider
In addition to the hardware and software mentioned above you may want to consider some other items that will complement or speed up your workflow.

Hardware like that shown above can provide shortcuts to speed up the recording and editing process. Companies like Loupe deck, Editors Keys and Monogram Creative Console all provide hardware to complement your studio. If nothing else be sure to get to grips with the keyboard shortcuts in your DAW.
When you start thinking about voiceover recording equipment, these are things you might not think of straight away. I have recently changed to an electronic ‘rise and fall’ standing desk. It can be all too easy to sit down in the studio and loose track of the hours. Having everything attached to the desk you are then free to work standing up or sitting down. Everything quickly and efficiently moves to your required eyeline.
Just because it’s a bargain, doesn’t mean you should get it. There are lots of deals on Black Friday, for example, but does the purchase aid your business? Increase your workflow? Will the end customer know the difference?

You may require some additional pieces of software to connect your studio to another remotely. When I started as a voiceover, ISDN was considered a must have. Now most of my remote sessions are carried out over Source Connect and ipDTL+. These allow me to link up to another studio and then they can record me as if I were in the room with them. Sessions can be recorded over networking sites like Zoom. I would recommend recording the audio at your end and send them the full session file afterwards.

Voiceover Recording Equipment Bundles
As I mentioned earlier it may be better value for money to buy a VoiceOver bundle. Here are three options by Se, Focusrite and Rode. Black Friday and Cyber Monday will also turn up lots of great bargains.
Well, that ended up being longer than I planned and still really only scratched the surface. Hopefully that has answered some of the questions you may have had regarding your studio setup. As always if you have any questions you can get in touch here.
What’s next…
The next blog post will discuss Voiceover Casting Websites.